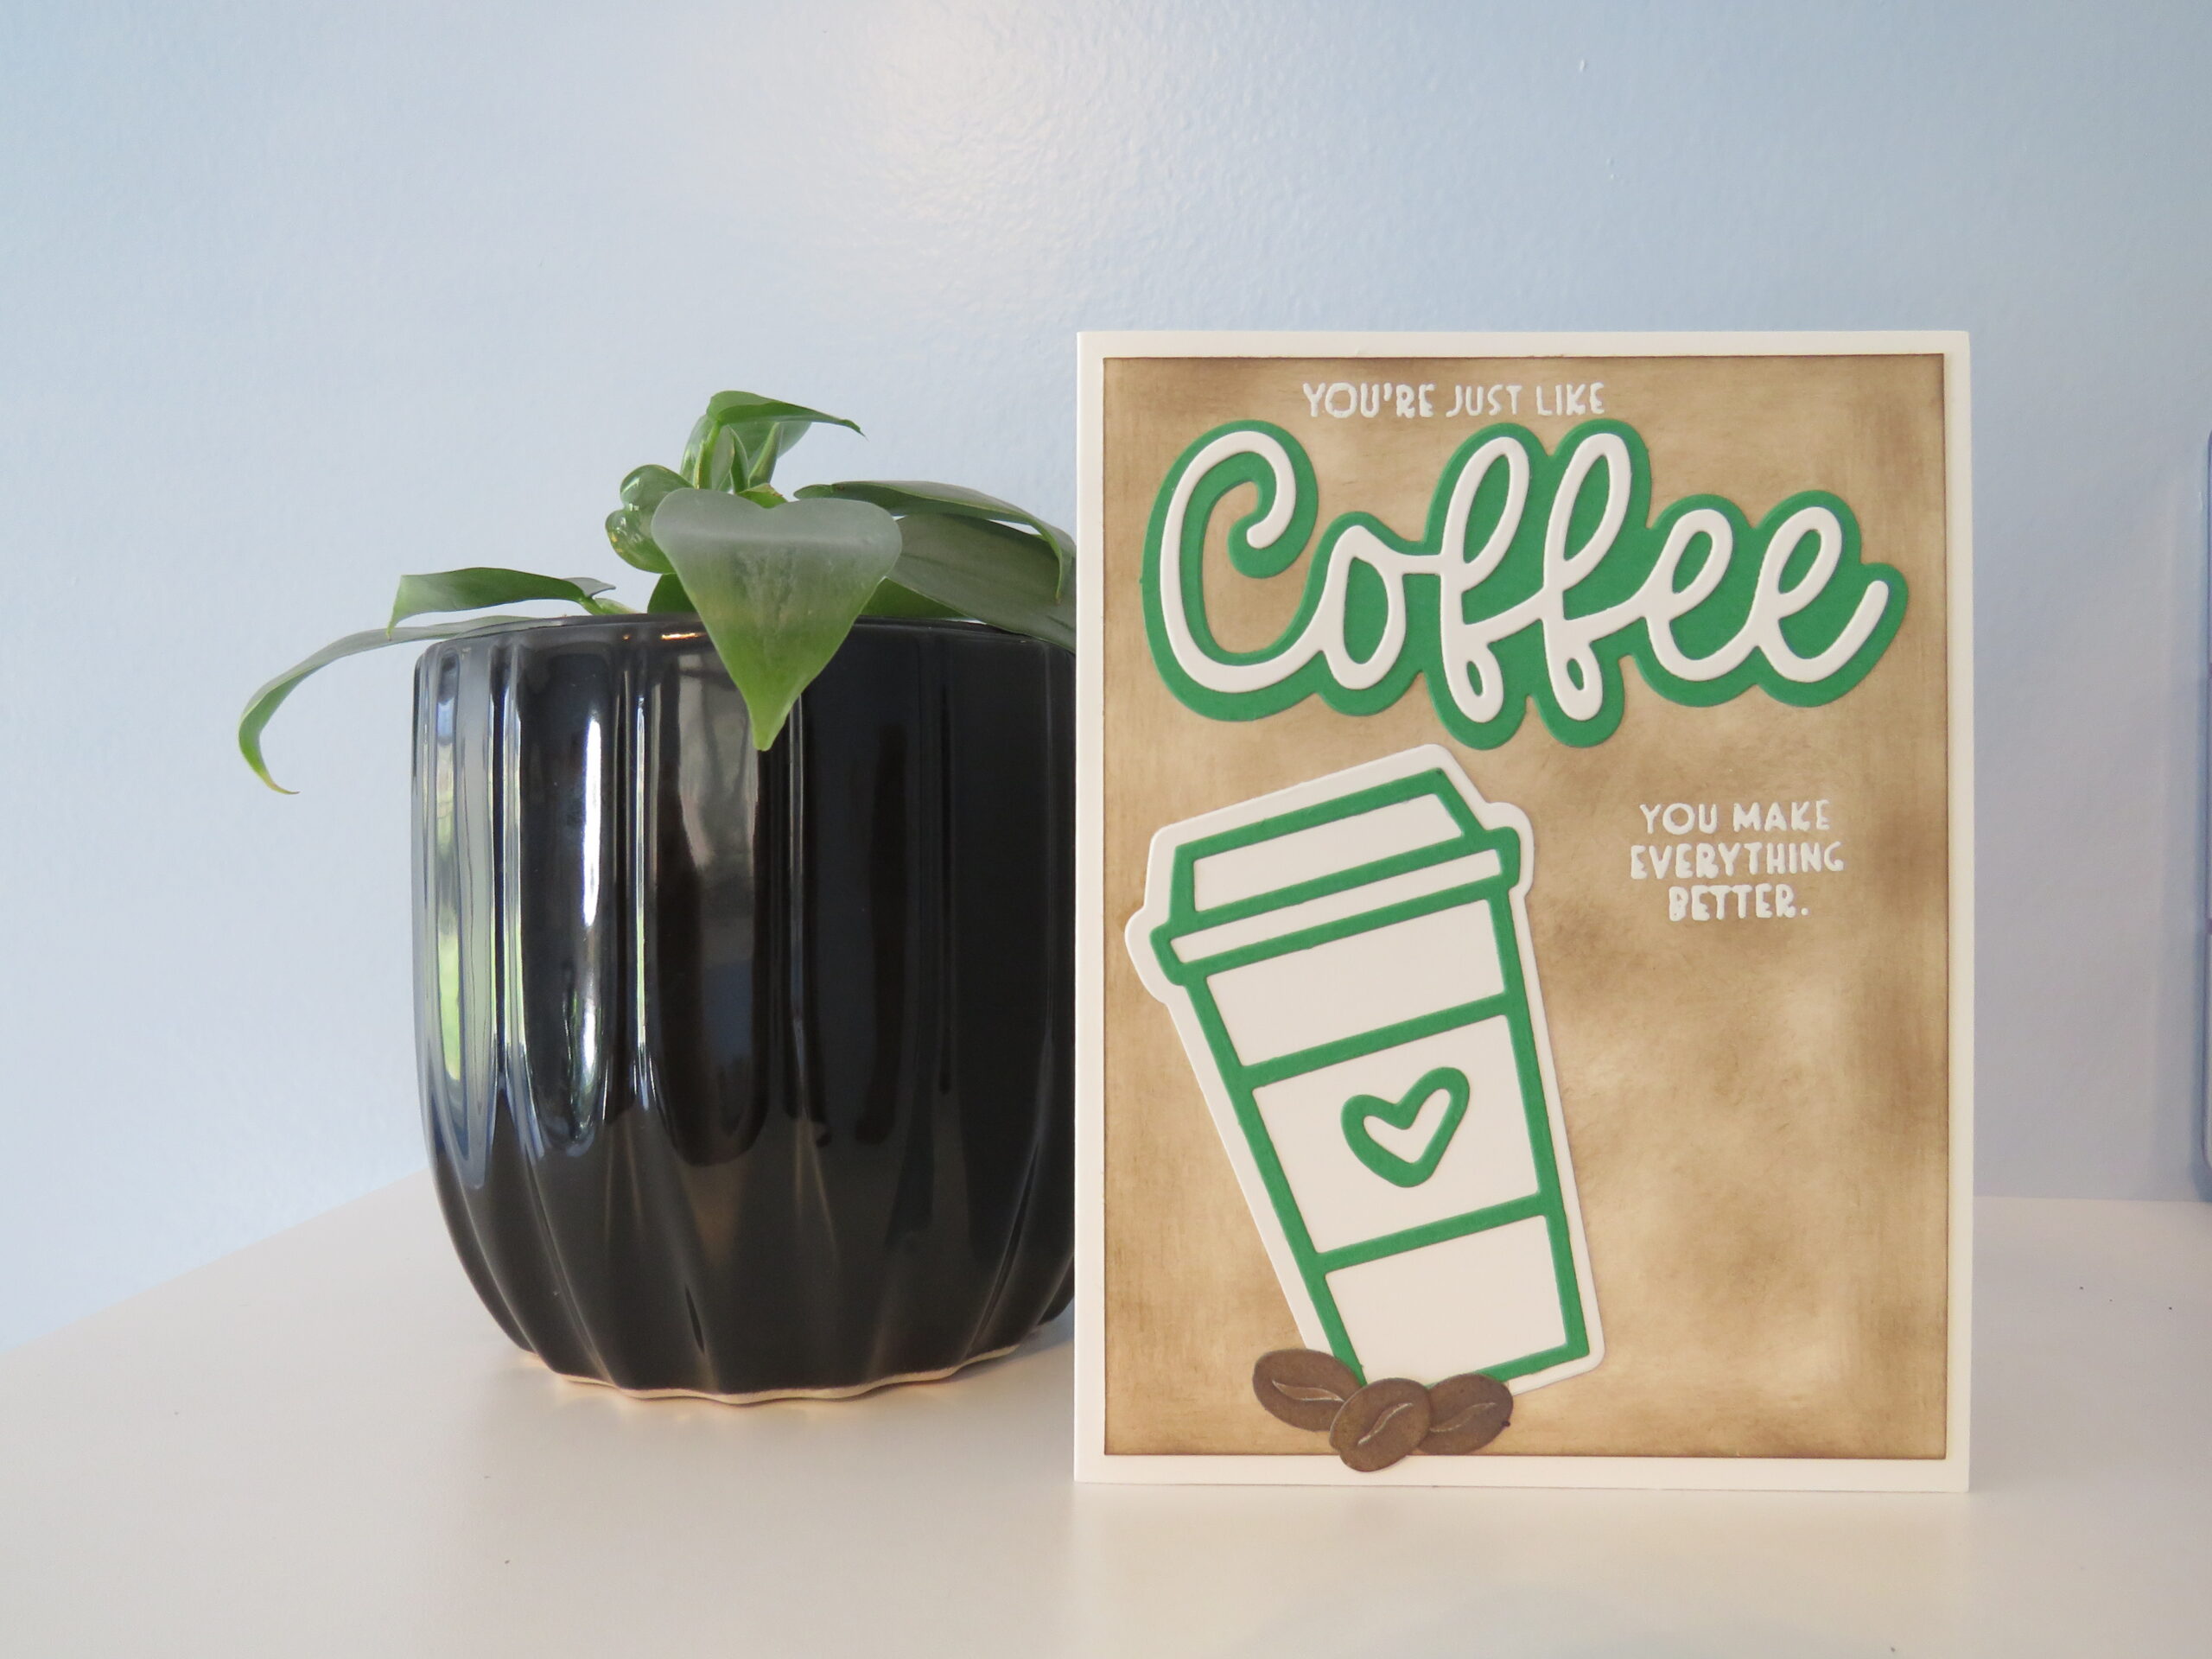
Calling all coffee lovers!! Who doesn’t love a good cup of coffee? I’ve made several coffee cards since I started this card making journey, but this is my first coffee card blog. I got this cute little coffee stamp and die set and just couldn’t resist this cute card.
So, to start off with, I made an A2 (4 ¼ x 5 ½ inch) card out of Recollections white 110lb cardstock. I made the 4 x 5 ¼ inch card front from the same white cardstock. I used a finger dauber with Tim Holtz distress oxide ground espresso ink to give the card front a coffee colored look.
Next, I used my coffee die cut set (I have no idea what brand it is or where I got it from) with the same white cardstock and ran them through my Gemini Jr. I also used a green cardstock for the outline of the word coffee and also for the details on the cup. I ran those through my Gemini Jr. I attached the white and green pieces together using Bearly Art precision glue. For the little die cut coffee beans, I used the same ground espresso ink and the finger dauber that I used on the card front, just making it darker for the coffee beans.
To stamp the sentiment, I placed all the die cut pieces where I wanted them to go on the card so I could see where to stamp the words. I stamped the words with my Wow clear embossing pad and heat set them using Wow white embossing powder.
Using Bearly Art precision glue, I adhered the card front onto the card base and then adhered the die cut coffee word and the coffee cup onto the card front. I glued the coffee beans at the bottom of the cup, overlapping each other a bit. I left the inside blank so the sender can write their own personalized message.
I have a newsletter! By subscribing, you can stay up to date with my newest designs and techniques. I will not spam, I promise, and you can unsubscribe at any time.


Leave a Reply